Skinny Vanilla Latte

Vanilla Latte

I am a true Starbucks lover. When I became lactose intolerant, I was forced to eschew those other coffee chains that often don’t carry non-dairy options. Several years later and I haven’t looked back. Something about that frothy treat hitting my lips that instantly makes my day better. Since this can be quite the expensive love affair, I decided to start making some drinks at home.

I have consumed a lot of mediocre lattes in my quest for my at-home treat, but here’s what I’ve come up with:
– 2 shots espresso
– 1 c steamed, frothed milk
– 1 tsp simple syrup
– 1/4 tsp vanilla extract

Super Easy Sorbet

Sorbet

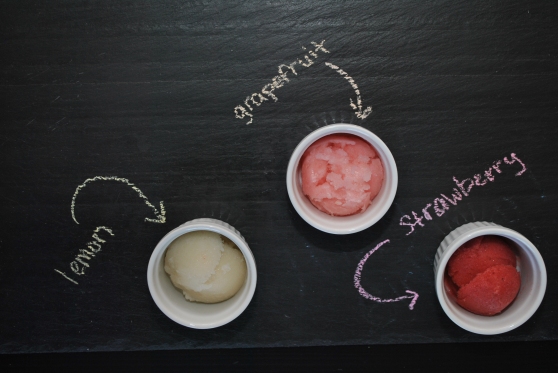
With summer right around the corner, I got the urge to dip into my recipe box for a fun sorbet. There’s nothing more refreshing than a tangy, cool summer treat. Since I recently snagged a bunch of fresh produce I decided to make lemon, grapefruit and strawberry sorbets.

The basic recipe is fairly easy to follow. It’s really just frozen simple syrup and a puree/juice. When using a puree to make my sorbet, I like to do 1:2 simple syrup to puree. In this case I did one cup of simple syrup and two cups of strawberry puree. (Full recipe below.)

Not all fruits lend themselves to a nice puree. As a hater of pulp, I stick to using the juices from my favorite citrus-y (but pulpy) fruits. When it comes to using juice to create a sorbet, I tend to do a 1:1, simple syrup to fruit juice. Since you’re lacking the solids of a puree, if you do 2:1, simple syrup to juice, you’re going to end up with a popsicle. For the lemon and grapefruit sorbets, I used one cup of simple syrup and one cup of fresh fruit juice. (Full recipes below.)

The creation process is as easy as the recipe. To create a cup of simple syrup, heat a cup of water in a sauce pan and dissolve in one cup of sugar. Stir over medium heat until the sugar fully dissolved and the mixture comes to a boil. Let it boil for oneĀ  minute and remove from the stove to cool. (If I’m being impatient, I will put it in the fridge to cool.)

While the simple syrup cools, create your puree or juice your fresh fruit. I like to add a splash (about a TBSP) of lemon juice to all my purees for that extra tart taste but it’s not necessary.

Once the syrup is cooled, combine it with the puree/juice. At this point, if you have an ice cream maker, just toss the mixture in there and you’re all set! We have the old-school Waring ice cream maker from the early ’90s. Despite the horridly designed box and graphics, you can’t fault it for being reliable. The only downfall is that the thing is SO loud. I seriously think I’d rather sitting on the tarmac at Laguardia Airport than sit in the same room as that ice cream maker. Since I just didn’t have the patience for that noise, I decided to use the freezer method.

Strawberry Sorbet

Dump the mixture into a 9 inch, metal baking dish and stash it in the freezer. Check it every hour or two and when the mixture is a little more than half frozen, pull it out, break it up with a fork (this shouldn’t be too hard) and run the whole thing through the blender or food processor. This will help infuse some of those delightful little air bubbles into the sorbet that you would naturally get from the churning of a traditional ice cream maker. If you’re busy chasing kids or catching zzz’s, it’s not the end of the world if you skip this step. But if you’re intent on following the directions you can always pull out the totally frozen sorbet, let it melt on the counter for a while and then blend it up again.

Without further adieu, here are the recipes that I used:

Lemon Sorbet

  • 1 c sugar
  • 1 c water
  • 1 c fresh squeezed lemon juice

Strawberry Sorbet

  • 1 c sugar
  • 1 c water
  • 2 c fresh strawberries, chopped
  • 1 TBSP lemon juice

Grapefruit Sorbet

  • 1 c sugar
  • 1 c water
  • 1 c fresh squeezed grapefruit juice

Enjoy a Purple Sunrise every morning

Now that the temps are rising outside, I find myself craving smoothies, so why not make them healthy? I’ve found that pineapple and mango have the perfect citrus-y flavor to cut through the sometimes bitter flavors of spinach and kale. (Read: they cover up that gross, healthy taste). It takes a few test runs to really get something right, and I’ve tasted my fair share of (sort of gross) smoothies in the process so without further adieu, I give you Purple Sunrise:

PurpleSunrise2-Lrg

  • 1 frozen banana
  • 1/2 c fresh cubed pineapple
  • 1/2 c frozen mango
  • 1 c packed kale
  • 1/2 c frozen blue berries
  • 1 c orange juice

Enjoy!
Lauren

Purple Sunrise Smoothie

Specialty Pizza – Made by You

Who doesn’t like pizza? Even after I became lactose intolerant I couldn’t resist the chewy goodness of a freshly baked pie. After more than a few stomach aches, I taught myself to make my beloved pizza at home. Thankfully, making pizza is basically the easiest thing ever.

DIY Pizza Dough
If you’re feeling adventurous, you can likely make a pretty good pizza dough with ingredients that you have around the kitchen.

  • 3 1/2 to 4 c flour (plus more for rolling)
  • 1 tsp sugar
  • 1/4 tsp active dry yeast
  • 2 tsp kosher salt
  • 1 1/2 c water, 110 degrees F
  • 2 TBSP olive oil

Combine the bread flour, sugar, yeast and kosher salt in the bowl of a stand mixer. While the mixer is running, add the water and 2 tablespoons of the oil and beat until the dough forms into a ball. If the dough is sticky, add additional flour, 1 tablespoon at a time, until the dough comes together. If the dough is too dry, add additional water, 1 tablespoon at a time. Scrape the dough onto a lightly floured surface and gently knead into a smooth, firm ball.

Grease the mixer bowl (or another large bowl if you’re into doing dishes) with a bit of olive oil, add the dough, cover the bowl with plastic wrap and put it in a warm area to let it rise for about an hour. The dough should have about doubled in size. Divide it into 2 equal pieces and let them rest for 10 minutes before rolling out.

Top it Off
Now that you’re all rolled out, it’s onto the important part – toppings! I personally love salty toppings (Hawaiian pizza confuses me) so I’m sharing my favorite combination. Prosciutto, arugula and goat cheese.

  • 1/2 c arugula
  • 2 slices thinly cut prosciutto
  • 1/4 c goat cheese
  • 1/4 c mozzarella

This is pizza so feel free to add or subtract ingredients or adjust the amounts according to your taste. Bake at 375 for about 15 minutes (depending on your oven).

DSC_0029

DSC_0031DSC_0038

Cheers!
Lauren

Chocolate Peanut Butter Granola Bars

I’m a serious snacker. It has always been my diet downfall and the only way I know to combat it is to keep healthy, filling snacks around me at all times. Because of this, I go through about a dozen cliff bars and the like weekly. I got to thinking that making them can’t be all that hard, right? Here goes nothing:

Ingredients:
1/4 C coconut oil
1 C peanut butter (I used Teddy but I’m sure anything natural will give you the same results)
1/2 C agave nectar
1 tsp vanilla
2 3/4 C quick oats
1/2 C shredded coconut
1/4 C sliced almonds
1/4 C salted sunflower seeds
1/2 C chocolate (I used our leftover chocolate easter bunnies because those are NOT snacks that I want sticking around.)

Image

  1. Line an 11 x 7 baking dish with waxed paper
  2. In a sauce pan, melt coconut oil, peanut butter and agave nectar, stirring consistently.
  3. While you’re melting, combine oats, shredded coconut, almonds and sunflower seeds in a separate bowl.
  4. When the peanut butter mixture is melted and smooth, remove from heat and fold in vanilla and dry ingredients.Image
  5. Press the mixture into the prepped pan, on top of the waxed paper. You have to really press it in there or the bars will come out crumbly. I used a meat tenderizer to press it in but I’m sure a heavy-duty spatula or the back of a small bowl would work just as well.
  6. Because I was upcycling some chocolate easter bunnies, I broke them into small pieces and melted them in the microwave by nuking them on high in 25-second increments until they’re melted.
  7. Once melted, I just used a spatula to spread the chocolate on top of the bars.
  8. Because I’m impatient, I tossed the whole pan in the fridge to cool but I’m sure you could just leave it on the counter for a few hours. Once cooled I dumped the whole batch out onto a cutting board, diced em up and wrapped them individually with plastic wrap.

Image